
DIY "Graffiti" Roll-up Window Shade
I made another roll-up window shade for the bedroom/den window this weekend. This time I used burlap for the shade. Also, I spray-painted a design onto the fabric with a "graffiti" stencil my brother made, instead of the scrap fabric design I had done on the last shade. My brother did a really good job designing this stencil and I love dinosaurs, so I really wanted it somewhere in the house. I was originally going to use the stencil on the brick wall but then I started to wonder if it would work on fabric and got the idea of using it for the window shade. It worked perfectly. Here's a little "how to" for how I make these roll-up shades; 1. Fabric (width of window plus 2") x (height of window plus 8"-12") 2. Single pulley for 5/16" rope 3. Double pulley for 5/16" rope 4. 2" Ceiling hooks 5. 2" Eye screws 6. 1/2" nylon rope (roughly height of window x6, plus width) 7. Rope cleat 8. 3/4" x 3/4" wood stick (width of window) 9. 1/2" steel rod (width of window)


I use a framing square to measure my fabric and chalk to mark it. I cut the material about 2" wider than the opening and about 12" taller. I leave it longer (in height) to help it roll up easier. I then fold the side edges over about 1" and iron the them flat. I use little pins to hold it in place while I iron.


I then sew all the edges using a zig-zag style stitch on my machine. I use this stitch because I like the way it looks and it seems to hold better than a straight-stitch, especially on burlap, canvas, etc. I slip a piece of 1/2" steel rod in the bottom edge to weigh down the shade, but you could also use a wood dowel or closet rod.


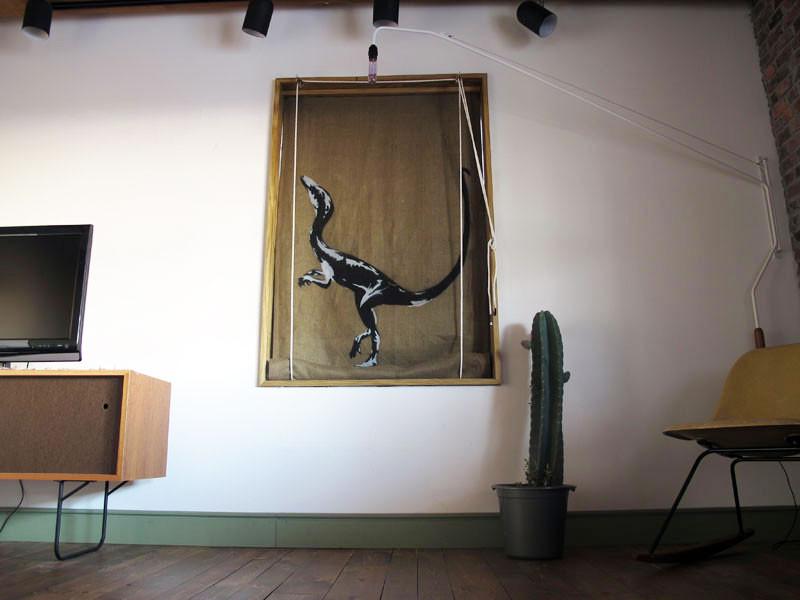
The stencil my brother made, is a double-layered design using a base coat and a highlight coat. I chose black and white for the design to keep things neutral. I used flat paint for less sheen and to not risk running or bleeding through. The paint does seep through the burlap a little though, so make sure to put something under it if you decide to use paint on burlap.


I stapled a 3/4" x 3/4" piece of wood to the top edge of the shade and screwed it to the top of the window jamb. I looped two pieces of 1/2" nylon rope through 2" long "eye-bolts" and sewed them close. Each piece of rope needs to be about; window height x3 +width. 
Attach the eye-screws (attached to the ropes) to the top of the jamb behind the shade about 4-6" in from the sides. Let the ropes hang down behind the shade to the floor.


Attach the ceiling hooks in front of the shade (aligned with the eye-screws behind). Hang a single pulley on the left hook and a double pulley on the right hook. Bring the ropes up around in front of the shade and through the pulleys. The left rope runs through the single pulley, across through the double pulley and down the right side. The right rope runs up through the double pulley and back down the side. Attach the rope cleat somewhere to the side to wrap the rope ends around. 


You can use a thicker material if you want less light to come through. Burlap filters the light but still lets alot in. In fact, during the day, you can just see the shadow of the dinosaur design. The other shades I made out of canvas, block a little more sunlight.
Leave a comment
Comments will be approved before showing up.
Net Orders Checkout
| Item | Price | Qty | Total | |
|---|---|---|---|---|
| Subtotal |
$0.00 USD |
|||
| Shipping | ||||
| Total | ||||